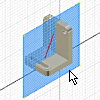
Work features are abstract construction geometry used when geometry is insufficient for creating and positioning new features. To fix position and shape, constrain features to work features.
On the ribbon, use the 3D Model tab  Work Features panel Plane command to define a work plane using feature vertices , edges ,faces , or other work features. Except in an assembly, you can create in-line work planes when a work feature command requires you to select a plane.
Work Features panel Plane command to define a work plane using feature vertices , edges ,faces , or other work features. Except in an assembly, you can create in-line work planes when a work feature command requires you to select a plane.
Use work planes when creating axes, sketch planes, or termination planes, or to position cross-sectional views or cutting planes.
Use a work plane when:
- A part face is not available as a sketch plane for sketching new features.
- An intermediate position is required to define other work planes (for example, at an angle to a face at an offset distance).
Place work planes at the center of cylindrical shapes and use them to anchor parametric dimensions between cylindrical features.
When creating 3D features, place a work point at the intersection of work axes and work planes. You select the work points to specify the path of the sweep.
Work planes can be placed at any orientation in space, offset from existing faces, or rotated around an axis or edge. A work plane can be used as a sketch plane and dimensioned or constrained to other features or components. In an assembly, you can create a work plane between two planar faces on separate components.
Each work plane has its own internal coordinate system. The order in which geometry is selected determines the origin and positive directions of the coordinate system axes.
In a part, a work plane can be created in-line while you are using another work feature command. The Work Plane command terminates as soon as the work plane is created.
Note: Optionally, you can resize a work plane. Right-click a work plane and clear the check mark from Auto-Resize, if necessary. Click a grip handle on one of the workplane corners and drag to resize.
In an assembly , use the Plane command on the 3D Model tab to define work planes that reside in the assembly, not in a part model. You can create a work plane mid-way between planar faces on a single part while editing the part. Midpoints are not selectable in an assembly.
Prior to the introduction of Direct Manipulation modeling techniques in Inventor R2011, the Plane command was the only method available to create work planes. This legacy method was, and still can be, used with one or more of the following relationships to define a work plane:
- On geometry (on three points, for example)
- Normal to geometry
- Parallel to geometry
- At an angle to geometry (on a plane and an axis)
Tip: To understand geometric dependencies, right-click a work feature in the browser or the graphics window, and then select Show Inputs. For example, you can right-click a work point to highlight the geometry from which it was created, such as a work axis and a work plane.
Note: Although still valid, the Plane command has been enhanced in Inventor R2011 to now present the Inventor user with a convenient drop-down menu listing each of the possible combinations available for work plane creation.
- On the ribbon, click 3D Model tab Work Features panel Plane .
- Select appropriate vertices, edges, or faces to define a work plane.
- For offset work planes, drag the work plane to the appropriate location and enter a distance or angle in the Offset edit box. Click the check mark in the edit box to accept the preview and create the offset work plane.If more than one solution is possible, a selection box appears. Click the forward or reverse arrows in the selection box, and then click the check mark when the correct solution is previewed.
- Optionally, resize the work plane. Right-click the work plane and clear the check mark from Auto-Resize, if necessary. Click a grip handle on one of the work plane corners and drag to resize.


.gif)
0 comments:
Post a Comment